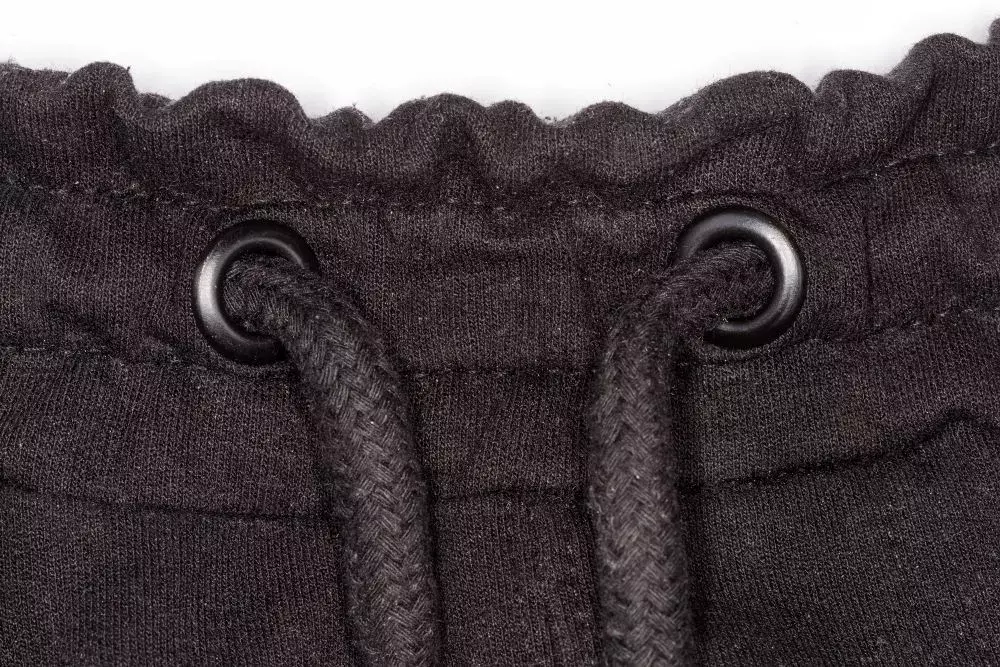
A Helpful Guide to Drawstrings Using Grommets
2024-01-09
You can’t always rely on elastic to hold your garments in place, and not every piece of clothing looks right with belt loops. You can always tailor a pair of pants, dress, or shirt to an exact size, but that means the wearer can never lose or gain weight.
Instead, you can add a drawstring for maximum flexibility and incorporate grommets to guide the drawstring for some added visual flair!
How Drawstrings Work
A drawstring can be made from various materials, such as thin rope, fabric, or ribbon. From there are the eyelets, the holes where the drawstring enters the garment. These may be sewn in the same fashion as buttonholes but can also be made using grommets. Lastly, there’s the casing, a channel inside the garment that holds the drawstring in place.
Why Use Grommets?
If buttonholes will work just fine, you may wonder why you should go to the trouble of installing grommets. There are several good reasons, including the following:
- Grommets offer superior longevity and durability.
- Grommets are attractive.
- Grommets are simple to install.
Perhaps the best reason, though, is that it’s your project, which means you can use grommets however you like!
Supplies for Setting Grommets
If you’re set on using grommets for your drawstring, you’re going to need the following:
- A set of grommets with enough pieces to complete the job
- A setter and anvil
- A mallet
- A hard surface on which you can hammer in your grommets
If you don’t have a dedicated work table, set down some scrap wood or an old cutting board to protect the surface of your work area. The intent is to ensure you’re not hammering directly onto a surface you want to keep undamaged, such as your dining room table!
Drawstring Materials
For the drawstring itself, you can use cording, ribbon, twill tape, or leather; any material you can fashion into a robust drawstring that will pass cleanly through the grommets and casing will work. You’ll just want to ensure that your drawstring won’t stretch or wear during use, which means — if you’re fashioning your own drawstring out of scraps of fabric — it will take some preparation to ensure it’s up to the task.
Making the Drawstring
Suppose that you’re making a drawstring for a pair of pants. To make your own drawstring, cut a piece of fabric to dimensions of one inch x the desired length. Consider the waist size and the necessary amount of fabric to tie the drawstring without having too much hanging down.
Next, you will fold your fabric to add strength and make it look nice. You can use a bias strip maker or fold and iron it yourself. After that, fold it lengthwise and iron again. Your final product will be ¼” wide. Stitch the edge and tie the ends in knots after you feed it through the channel and grommets. You can also stitch the ends if you like, choose to tie on beads, or use cordstops.
Forming the Casing
If you’re making a garment from scratch, you can place the casing in during construction, and if you’re modifying a garment, you can either sew on an extra piece of fabric or hem the existing fabric to create a channel for the drawstring. You may want to install the grommets and drawstring before closing off the casing, just to make things easier on yourself,
Setting the Grommets
First, apply a piece of interfacing to add strength to the fabric where the grommet will be set, then flip the garment/fabric over, put the grommet where you’ll be installing it, and mark it around the inside of the post. Doing so will make a perfectly sized circle at the site of your post.
Next, cut out the marked circle and place the grommet barrel in the hole. Flip the garment again and — on the side of the fabric with the interfacing — put the flange over the barrel.
Lastly, put the barrel into your anvil and put the setter on the flange, then use your mallet on the setter to join the flange and the barrel. Repeat for all the grommets you need to install, and that’s it — you’ve installed your drawstring!
All the Grommets and Setting Tools You Need Are at GoldStar Tool
Setting grommets is a cinch, thanks to GoldStar Tool! We carry a huge variety of grommet sizes and finishes, as well as all the tools you need to set them, so you can start shopping right away!


